Lesson 4: Realistic Drawings
MORE ABOUT BLUEPRINT DRAWINGS
Some drawings look more like the “real thing” than others. On a separate sheet of paper, answer the following questions.
1.) Which one of the three drawings below looks like the most real to you?
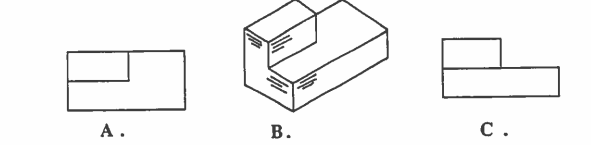
2.) Write some reasons why it looks more real?
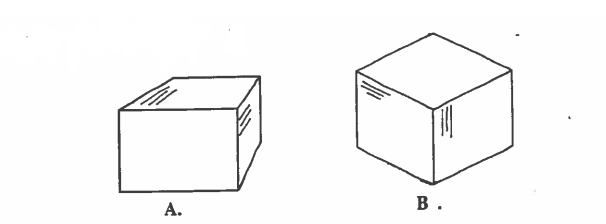
3.) Which of these two drawings do you think looks more real?
4.) Write some reasons why it looks more real?
REALISTIC DRAWINGS
Word List
| realistic | the quality a drawing or painting has when it looks like a real object. e.g., Carlos, that drawing you made is very realistic. |
| three-dimensional | the quality of a drawing that looks like it has the three dimensions of length, width, and height. e.g., A drawing can look three-dimensional, even when it’s on a two-dimensional piece of paper.Abbreviation: 3D or 3-D |
| corner | the point on a part where three planes intersect each other. e.g., The upper left hand corner of this part needs deburring. |
| stem | the main lower part from which the branches come. e.g. Flowers have stems, but trees have trunks. |
| branch | a road or a line that goes in a new direction away from the first path. e.g., The letter Y has a stem and two branches. |
| figure | a drawing used to help explain some writing; often it is a (or Fig.) technical drawing. e.g., If you look at Fig. 4, you will see that the part has three holes drilled into one side. |
| ink | a fluid used in a pen for writing or drawing. e.g., First make the drawings with a pencil; then go over them with ink. |
| isometric drawing | a three-dimensional drawing which uses the same measuring unit in all parts. e.g., The machinist should be able to make an isometric drawing. |
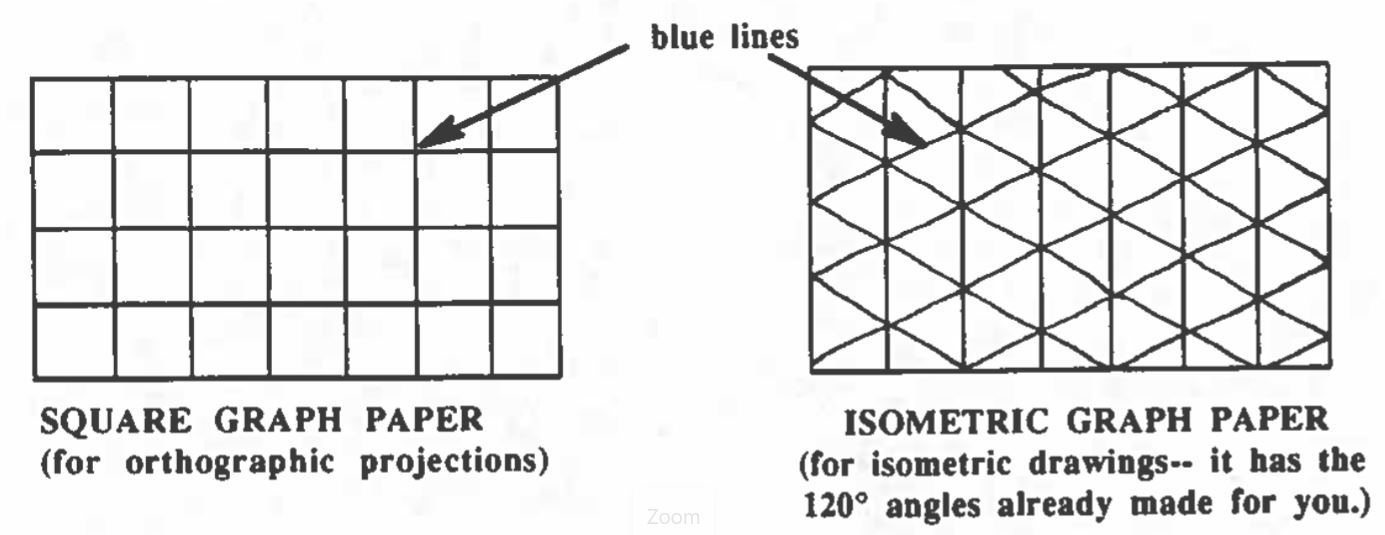
| graph paper | special paper with fine blue lines in a regular pattern, used to make drawings. e.g., We will study two kinds of graph paper in this lesson. |
| perspective | a kind of realistic drawing that shows an object getting smaller the farther into the picture you go. e.g., This painting is very realistic, because it uses perspective. |
| to vanish |
to disappear.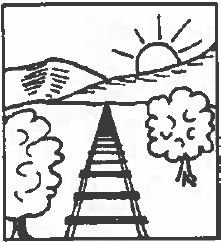 e.g., In a perspective drawing, two railroad tracks will seem to vanish in the distance, because they run together. Related Words: vanishing point = the point at which the lines in a perspective drawing run together and seem to disappear in the distance. |
| to clarify | to make clear, to ask questions in order to understand something better. e.g., Jim tried to clarify what the teacher said, by asking questions |
Exercises 6.4 New Vocabulary Practice
REALISTIC DRAWINGS
To make a realistic drawing means to make a drawing that looks like the real object. This can usually be done by making the drawing look as if it has three dimensions instead of just two. When we gave ”the three views” in the last lesson, they look flat and unrealistic, because we only see two dimensions for each view
In picture A we see a realistic drawing which seems to have three dimensions, even though it is drawn on a flat piece of paper which has two dimensions of length and width. Drawings B, C, and D look flat and two-dimensional, like the drawings from our last lesson (“the three views”).
Why does drawing A look like it is 3-dimensional? For two reasons:
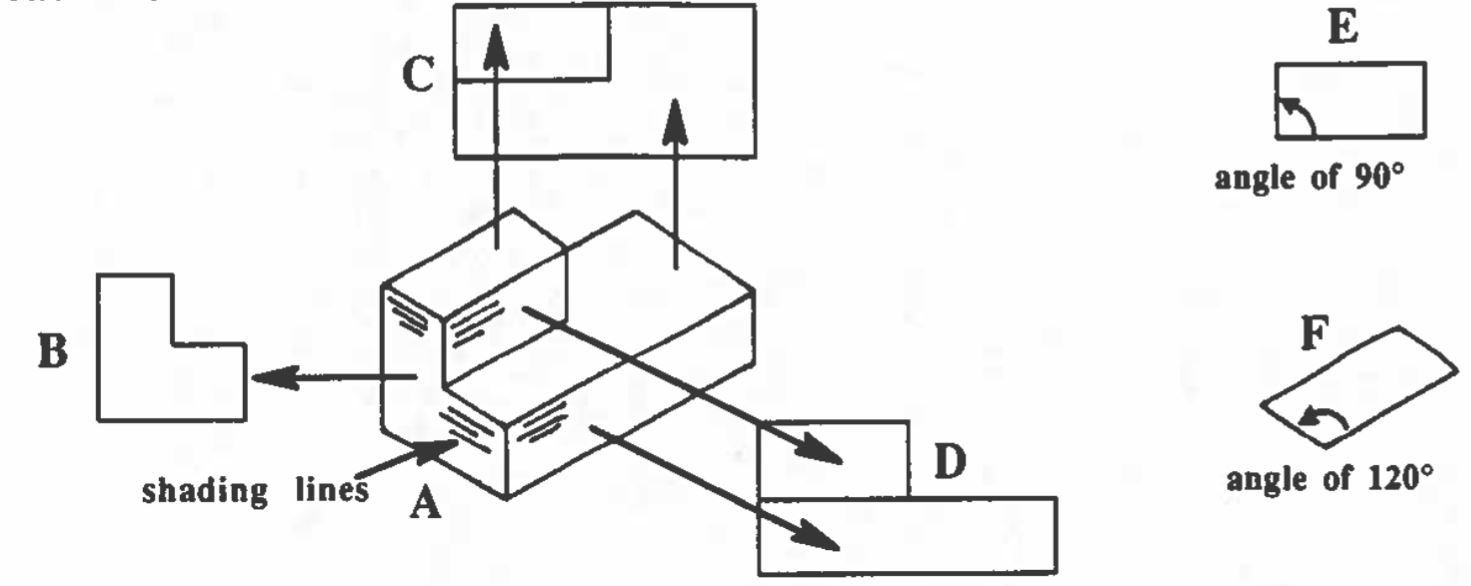
(1) Picture A is drawn at an angle where we can see three of its sides at one time, and the angles used to draw the corners are changed to make it appear as if you’re viewing the object from a different angle. In picture E, you see the side as it actually is, with square (900) comers; in picture F, the same comer is changed to 120° to make it seem like you’re looking at it from an angle, instead of directly. Both E and F are drawn on the same flat piece of paper.
(2) The picture uses shading to make it look more real. The shadings are little lines drawn on some of the faces of the part to make it seem that the light is hitting some faces and not others. The shading lines should be drawn parallel to the lines that make the drawing.
And so it is possible to draw picture A and show three views at one time; at the same time in pictures B, C, and D we see only one view at a time. We called the three views by the name which describes how they were made: orthographic projections. We have a special name for picture A–it’s called an isometric drawing.
1.) What is an isometric drawing? 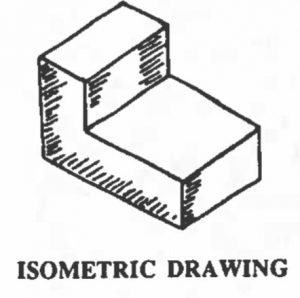
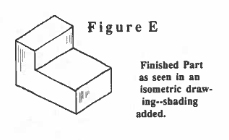
Look at the drawing at the right. We have seen this kind of drawing used to represent the part as it might look in three dimensions, as a completed part.
It is an isometric (“equal measures”) drawing.
The picture is called isometric, because all dimensions in the drawing are measured with the same unit (in our examples, the centimeter). It is more like the
“real part.” However it may not show us some of the
hidden lines or some features on the hidden sides of
the drawing.
You may need to make an isometric drawing from the three views given in a blueprint, or you may want to make an isometric drawing from looking at a real part which you want to copy. Therefore you should take some time now to practice making isometric drawings. It is good to know this, so you can put some of your ideas on paper, or communicate with machinists and engineers.
2.) How to make an isometric drawing:
How do you make an isometric drawing? The best way is to start with a corner and to draw it with three lines at 120° angles to each other.
(To make drawings like these, be sure to use a sharpened pencil, along with a steel rule, and a drafter’s protractor for measuring angles.)
Follow the steps on the next
Later we will use graph paper to help us make both orthographic projections and isometric drawings. Graph paper has light blue lines drawn on it with an equal distance between the lines. The lines are a guide to drawing and a help to accurate measuring. The lines will not copy in a copy machine, because of the light blue color. However your drawing can be easily copied on the machine.
Here is what the two kinds of graph paper look like:
Steps for making an isometric drawing:
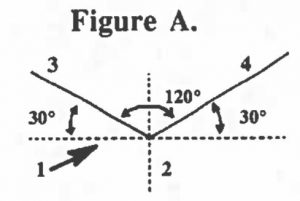 |
Step 1: (Fig. A) Draw a horizontal line (1) and then perpendicular line (2) which cuts in line 1. Using the point where lines 1 and 2 intersect, draw lines 3 and 4, each at 30o from the horizontal. This will form a Y shape, which the vertical lines as the stem and two branches which form angles of 120o. |
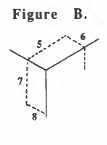 |
Step 2: (Fig. B) Using the Y as a corner of your part, start to draw the other lines of the part. Measure the units along the line; e.g., line 5 = 2 units, line 6 = 1 unit, line 7 = 2 units, and line 8 = 1 unit. As you draw the lines keep them parallel to some of the Y. |
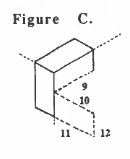 |
Step 3: (Fig. C) Continue with what you started in Step 2, by measuring and drawing lines 9, 10, 11, and 12. |
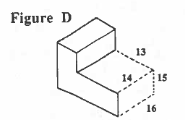 |
Step 4: (Fig. D) Continue with lines 13 and 16. When all the lines are done, go over the pencil lines with a fine-point ink pen and add the shading lines. Following these steps will allow you to draw an isometric drawing. |
 |
In these drawings, we used the centimeter as the “equal measure” unit–if the part was two units high and three units long, we used two cm to show the height and three cm to show the length. Now £ea the steps for making an isometric drawing. |
Print this worksheet: 6.4 Isometric Drawing Practice
3. Another way to make a realistic drawing
The isometric drawing is one way to make a drawing which looks like a real part, because it seems to be three-dimensional (length, width. depth), even though it’s drawn on a two-dimensional, flat surface.
Another kind of realistic drawing is the perspective drawing. The perspective drawing also shows three dimensions. Additionally, it shows the features of an object as looking smaller the farther away them are in the picture (just as you see them in real life).
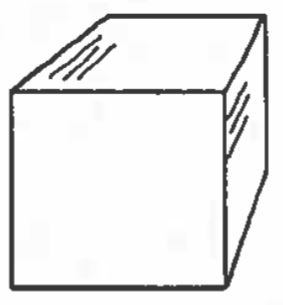
Below, we see two pictures of a cube.
Picture A is a perspective drawing, i.e., the sides of the cube seem to get smaller the farther into the picture you go.
Picture B is an isometric drawing; it does not seem to grow smaller, and if you measure any of the sides show, they are each 3 units long.
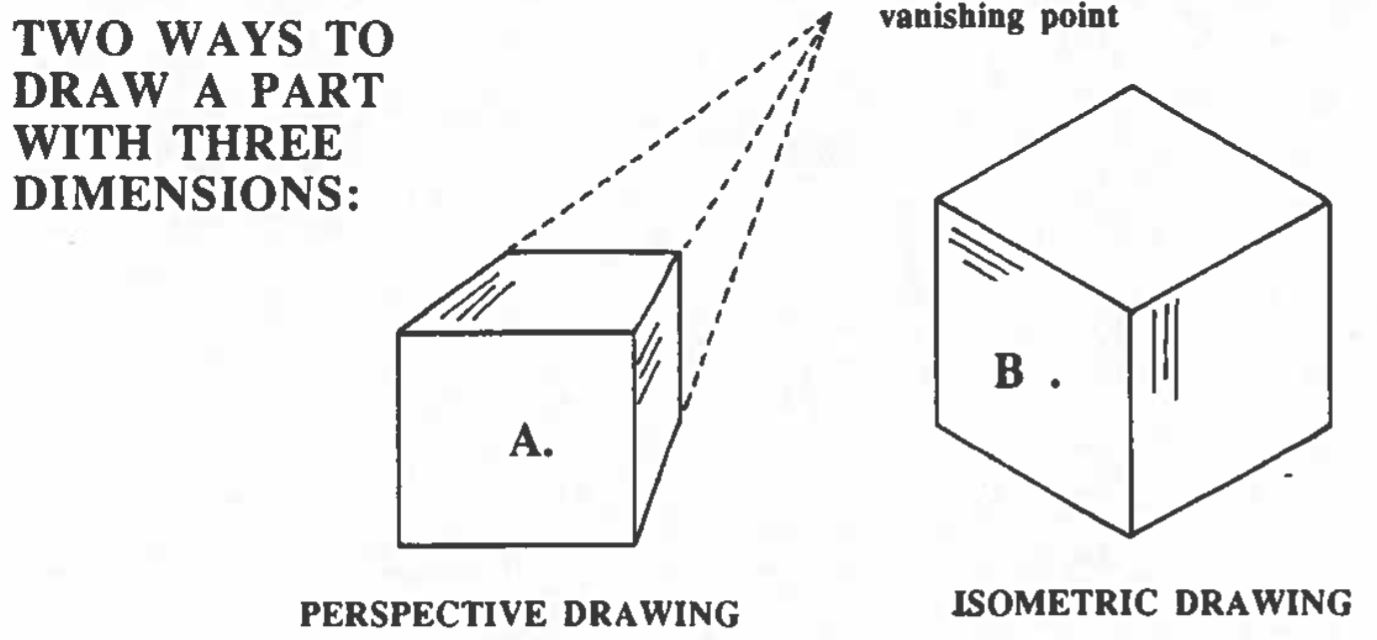
We will not practice making perspective drawings, but you can see that the drawing is made by the use of a “vanishing point” at which all the lines of the sides run together.
In an actual perspective drawing, those dotted lines would not be shown.
Conversation Practice: CLARIFYING WHEN YOU DON’T UNDERSTAND
Sometimes when you’re in class, it’s difficult to understand what the teacher or another student is saying. There can be traffic noise from outside, the teacher turns to the blackboard, someone coughs, the other student speaks too quickly or doesn’t say the words clearly, or you may start thinking of something else. Any of these things can cause you to miss part or all of what is being said. We want to remind you that it is OKAY to ask other persons to clarify what they said. Here is a conversation in which the student (Cora) asks the teacher to clarify:
Teacher: Everybody, pick up a piece of isometric graph paper from the two piles in front of you. {A truck drives by outside, and it is difficult to hear.)
Cora: Pardon me, teacher. I didn’t hear what you said.
Teacher: Thanks for asking. Let me repeat. You have two piles of graph paper in front of you. Pick up a piece of isometric graph paper and hold it up.
Cora: I understand we have two piles of graph paper in front of us. Again, please tell me what to do.
Teacher: Cora, look at the paper. Notice the differences, and pick up the one that is used for making isometric drawings.
Student: Oh, that’s easy. Here’s the isometric graph paper.
Comments:
•The student’s first question came when she did not understand anything of what was said. She asked the teacher to repeat the whole message.
•The second question tells the teacher that the student under- stands part of the message, but wants the last part repeated.
Print this worksheet for extra practice with isometric drawing: 6.4 Extra Isometric Drawing
